I recently went to Jamie Hazelden’s place to have a camp oven cook up and record a Podcast, we cooked up a delicious camp oven baked silverside. it was Jamies first time experiencing that and he absolutely loved it!
Listen to the podcast – www.thecampovencook.com.au/podcast/camp-oven-cooking-with-jamie-hazelden
Trust me once you bake one, you won’t do it any other way!
Find out more about Jamie – www.australianbushman.com.au
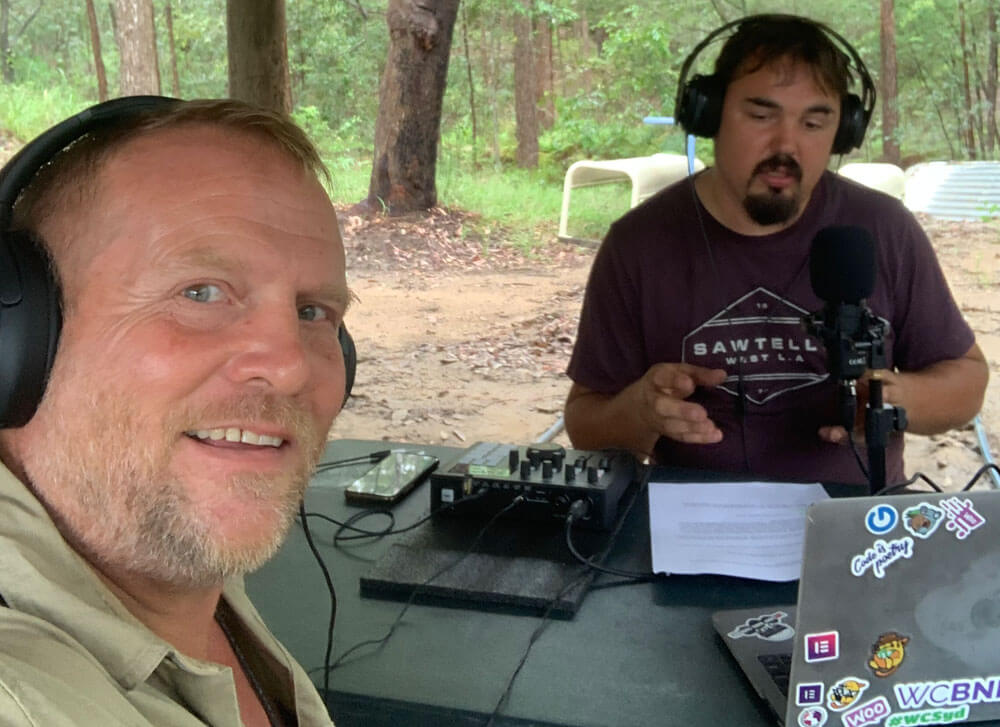
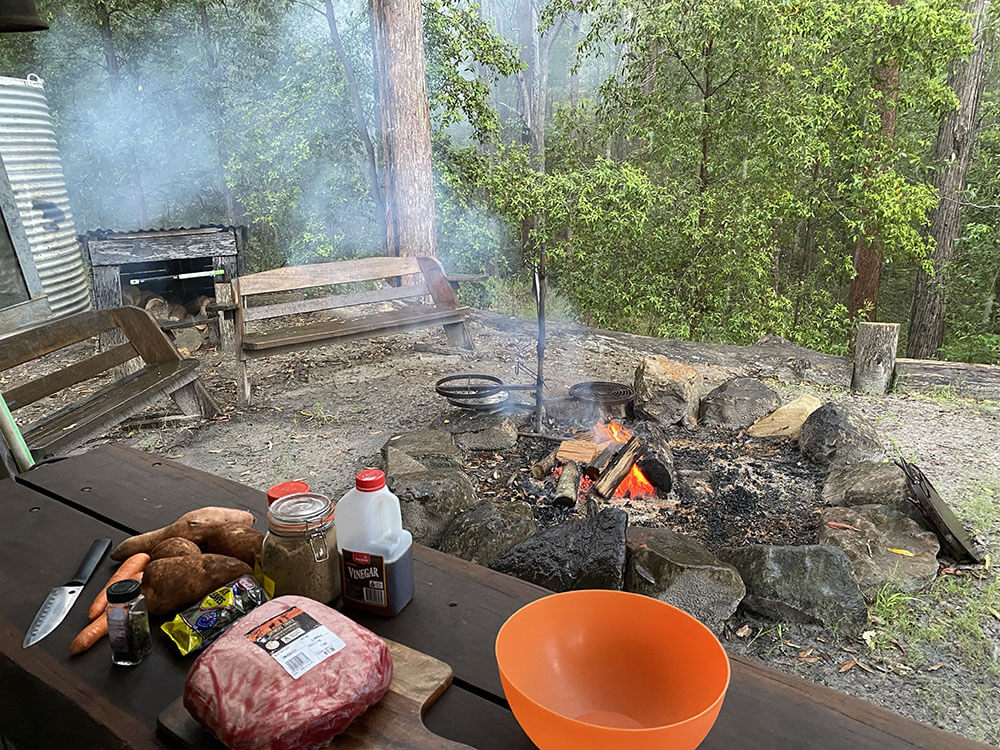
How great is Jamie’s camp area, it’s got an old 100-year-old house he moved to his property and has a great little cooking area, you want to start the fire, Gather all the ingredients and required equipment before starting the recipe.
Recommend Camp Oven Equipment
The basic equipment I recommend for camp oven cooking is a camp oven, gloves, a lid lifter and a trivet.
Next, you want to grab a bowl and place the silverside into a bowl, and coat the silverside in brown sugar and let it sit for as long as you can before cooking it. the brown sugar caramelises when cooking to produce a nice crust full of flavour.
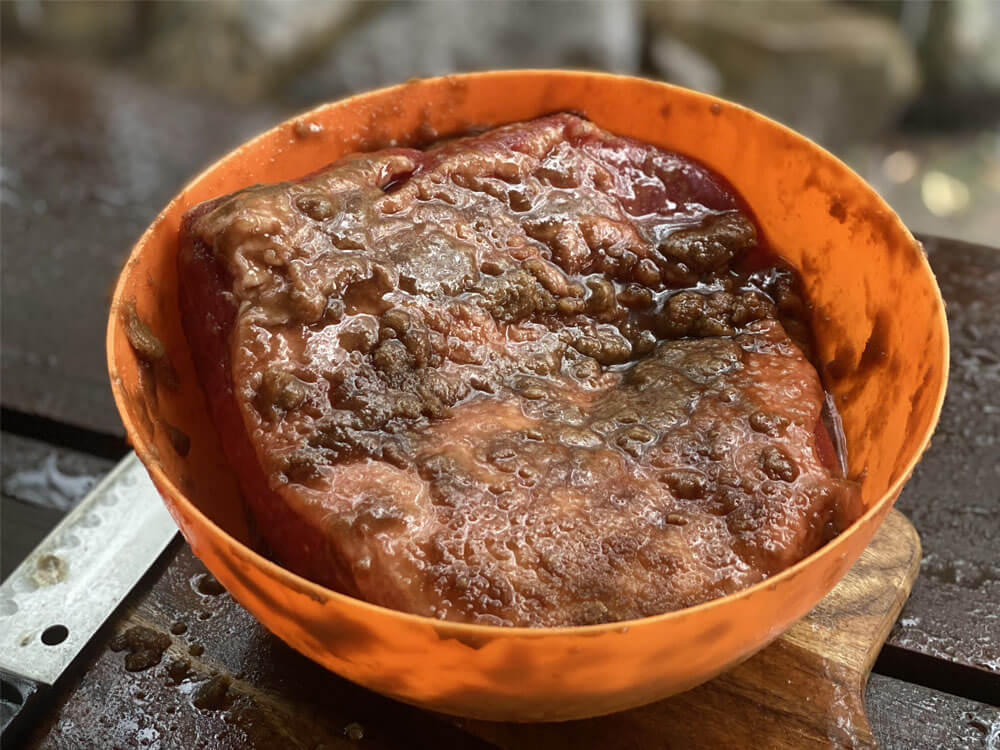
While the silversides resting you can get the camp oven-ready, the sugar naturally becomes moist, every now and then recoat with the sugar that goes to the bottom of the bowl.
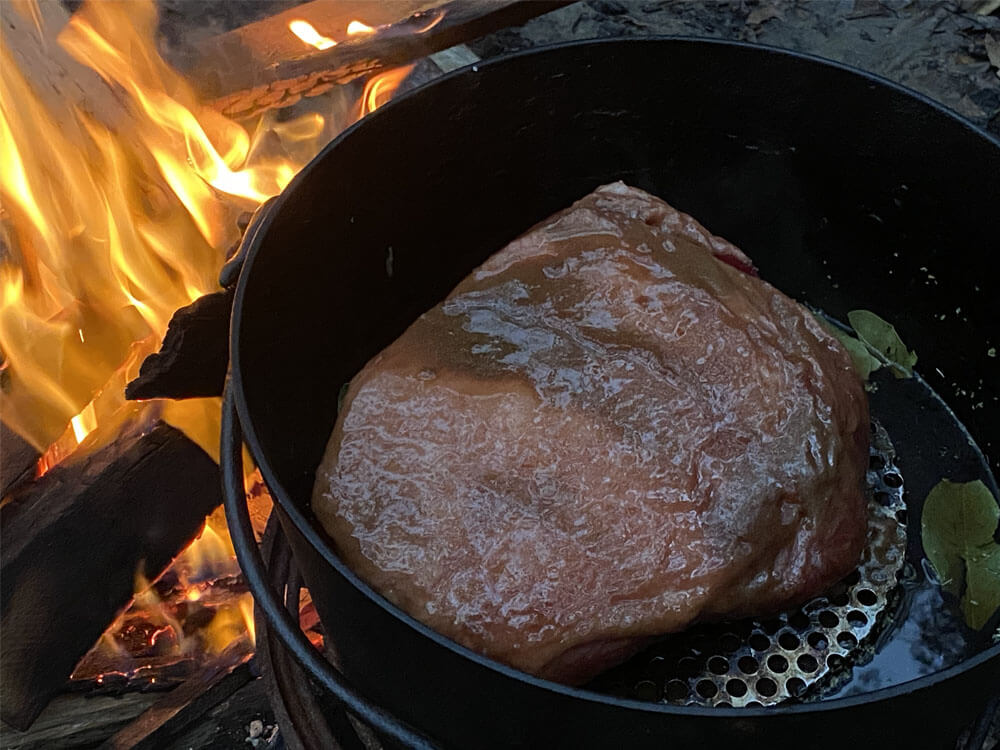
Get the camp oven and place it on some bottom heat, place in a trivet and add some brown vinegar and water to the top of the trivet and then add your mixed herbs, cloves, black peppercorns and bay leaves.
Note: The mixture is like how you would boil it however you are using at to create steam.

You will want to cook the baked silver side for about 2 hours, for the heat control, you have just enough heat under the camp oven, the idea is to have the liquid simmer away in the bottom.
And plenty of heat on the top, but not too much as it could burn, the top heat is to bake the silverside.
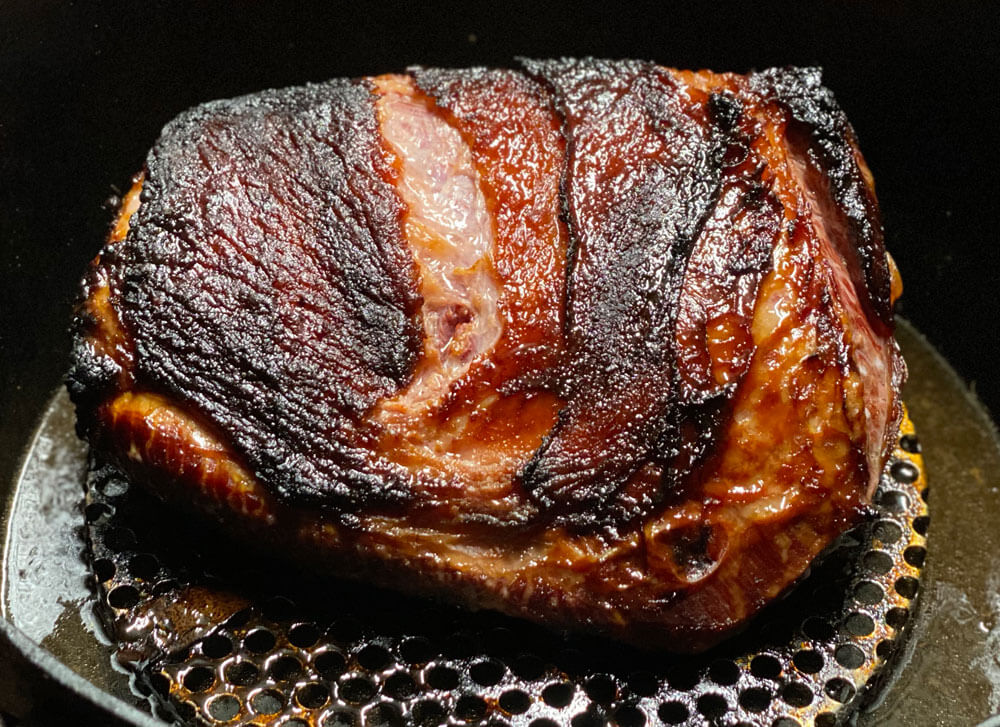
Note: The outside will look like it’s burning however it’s the sugar that’s cooking.
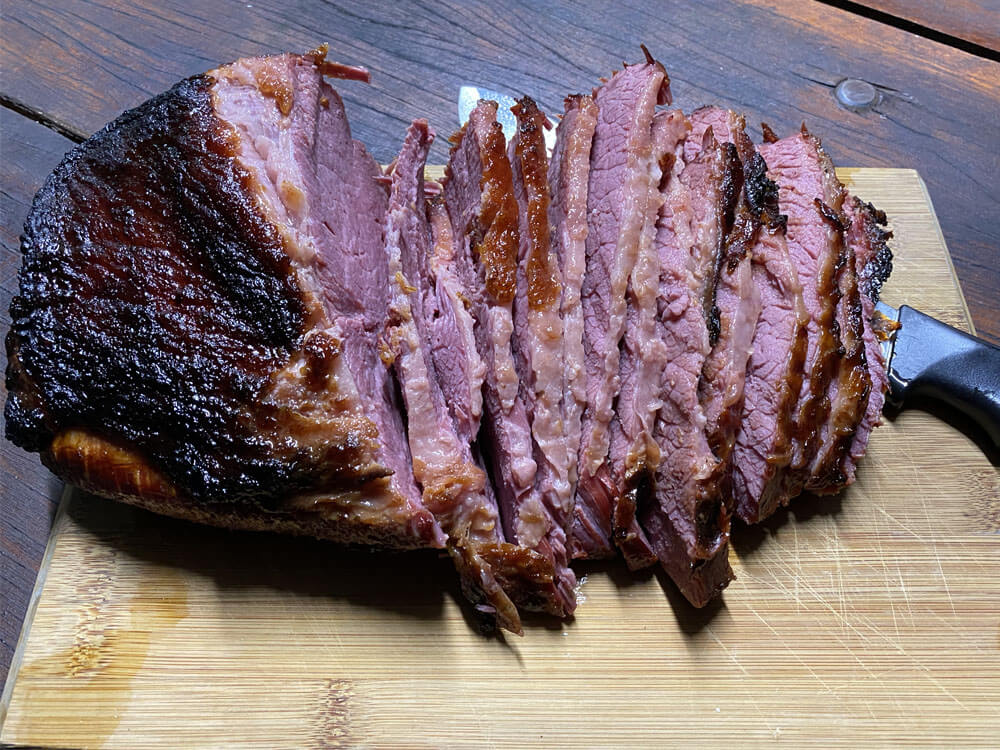
When its ready slice it up and eat it with whatever vegetables you cooked to go with it, it’s even perfect on fresh bread.
Rember you want it still firm, not falling apart when cutting it up.
Listen to the podcast – www.thecampovencook.com.au/podcast/camp-oven-cooking-with-jamie-hazelden
Watch the Video
Let’s cook a Camp Oven Baked Silverside!

Camp Oven Baked Silverside
Course: Beef Recipes, Main MealsCuisine: AustralianDifficulty: Medium4
servings20
minutes2
hours300
kcal9 QT
Top and Bottom Heat
2
hours20
minutesIngredients
1 piece of silverside
Brown Sugar
Bay Leaves
Black Peppercorns
Cloves
Mixed Herbs
Vegetables of Choice
Directions
- Start the fire, Gather all the ingredients and required equipment before starting the recipe.
- Place the silverside into a bowl, and coat the silverside in brown sugar and let it sit for as long as you can before cooking it.
- The brown sugar caramelises when cooking to produce a nice crust full of flavour.
- Note: the sugar naturally becomes moist, every now and then recoat with the sugar that goes to the bottom of the bowl.
- While the silversides resting you can get the camp oven-ready, place in a trivet.
- Add some brown vinegar and water to the top of the trivet and then add your mixed herbs, cloves, black peppercorns and bay leaves.
- Note: The mixture is like how you would boil it however you are using at to create steam.
- Cook the baked silver side for about 2 hours.
- For the heat control, you have just enough heat under the camp oven, the idea is to have the liquid simmer away in the bottom.
- And plenty of heat on the top, but not too much as it could burn, the top heat is to bake the silverside.
- Note: The outside will look like its burning but its the sugar that’s cooking.
- Slice it up and eat it with whatever vegetables you cooked to go with it, it’s even perfect on fresh bread.
- Rember you want it still firm, not falling apart when cutting it up.
Well I’ve never had baked silverside before and there is no way I would have thought it would come out so tasty. Fantastic job Mick my kids have asked for it twice already since you were here. haha